
Planning a trip to the United States? Visiting family, sightseeing, or attending a business event? The first step to getting your US visa is learning how to fill up the DS-160 form. If you’re a Philippine passport holder, this form is a must – but don’t worry!
Like a step-by-step guide to becoming a digital nomad or a guide to practicing how to balance work and travel, this article will break down the process, making it simple to understand and follow.
If you’re someone who dreams of working remotely while exploring new destinations, why stop at just a U.S. trip? Check out my special eBook, “The A-Z on Becoming a Digital Nomad,” where I share everything you need to know about starting your journey as a location-independent professional. From securing visas to finding remote jobs and managing your finances on the go, this guide is packed with actionable tips to help you turn travel into a lifestyle!
Now, many are scared to apply for USA Visa due to denied visa applications. The US Embassy is strict due to a huge number of illegal immigrants or TNTs there. However, if you have nothing to hid and go there on goodwill, it’s going to be very smooth.
Steps to Apply for US Visa (Nonimmigrant Visa)
Many applicants worry about visa denials, especially with the strict policies due to illegal immigration concerns. But if you have honest travel intentions and complete documents, the process will go smoothly.
1. Complete the DS-160 Form
Fill up the online Nonimmigrant Visa Application. Access the form here. Save your Application ID number to access your form later. Review the submission instructions carefully.
2. Pay the Visa Application Fee
According to Boundless, as of 2025, the nonimmigrant visa application process fee is $185. Filipino applicants can pay by cash at any Bank of the Philippine Islands (BPI) branch or online through PesoNet. Ensure you retain the payment receipt, as it is required for scheduling your interview.
3. Schedule Your Appointment
After submitting the DS-160 form and paying the application fee, create an account on the online appointment system to schedule your interview. You’ll need the following to schedule your appointment
- Passport Number
- MRV Dee Payment Receipt Number
- 10-Digit Barcode Number of your DS-160 Confirmation Page
4. Attend Your Appointment
On the day of your interview appointment, arrive at the US Embassy or Consulate at least 30 minutes before your scheduled time. Bring the following documents:
- Copy of your Appointment confirmation letter
- DS-160 Confirmation Page
- One recent passport-sized photograph that meets the US visa photo requirements.
- Current and old passports
- Supporting documents (while not mandatory, these can strengthen your application)
5. Interview with the Consular Officer
During the visa interview, be honest and confident. Answer all questions truthfully and provide any additional documents if requested. You’ll receive the visa decision immediately after your interview.
6. Receive Your Visa
If approved, your passport (with the visa) will be available for pickup or delivery in about 5 business days.
Travel insurance is recommended for peace of mind.
Supporting Documents for your US Visa Application
Not everyone may be asked to submit the following, but it’s better to prepare the following:
1. Financial & Employment Proof
- Business Registration (for entrepreneurs)
- Bank statements or proof of income
- Certificate of employment and tax returns
- Proof of property ownership (if applicable)
- Employment history (for work-based visas)
2. Travel-Related Documents
- Detailed travel itinerary
- Hotel bookings or invitation letters
- Flight Reservations (not required but helpful)
3. Additional Required Documents
- Employer letter (if traveling for work)
- School documents (if applying for student visas like F-1 and need address of the school)
- Relative’s US status proof (if visiting family)
- Criminal or court records (if applicable)

Steps to Complete the DS-160 Form
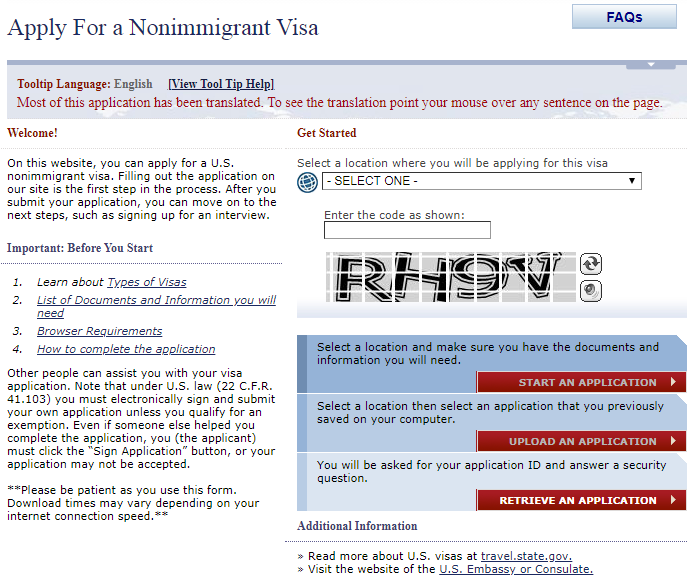
1. Start Your Application
Visit the DS-160 application page. Choose the U.S. Embassy or Consulate where you’ll apply. Enter the security code and click “Start Application.”
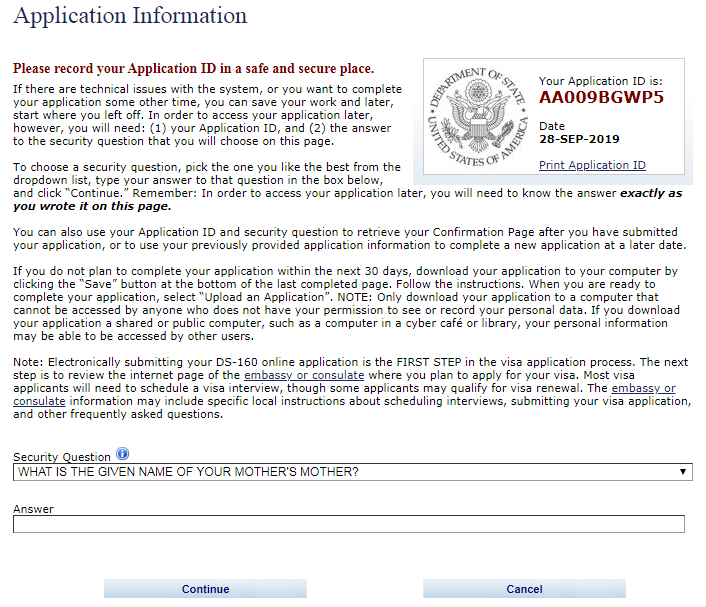
2. Save Your Application ID
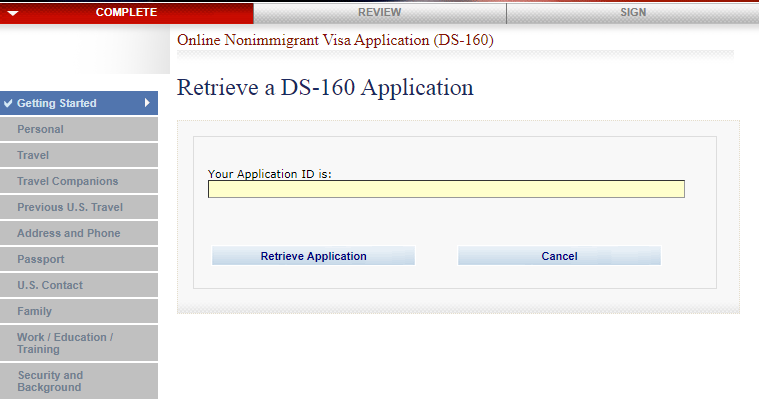
Write down your Application ID and answer the security question. If you need to pause, you can return later by entering your ID, surname, birth year, and security answer.
3. Fill in Your Personal Information
Personal Information
- Name: Match your passport (include middle initial if applicable).
- Marital status: Choose from Single, Married, Divorced, Widowed, Legally Separated, or Domestic Partnership.
- Date & place of birth: Ensure accuracy.
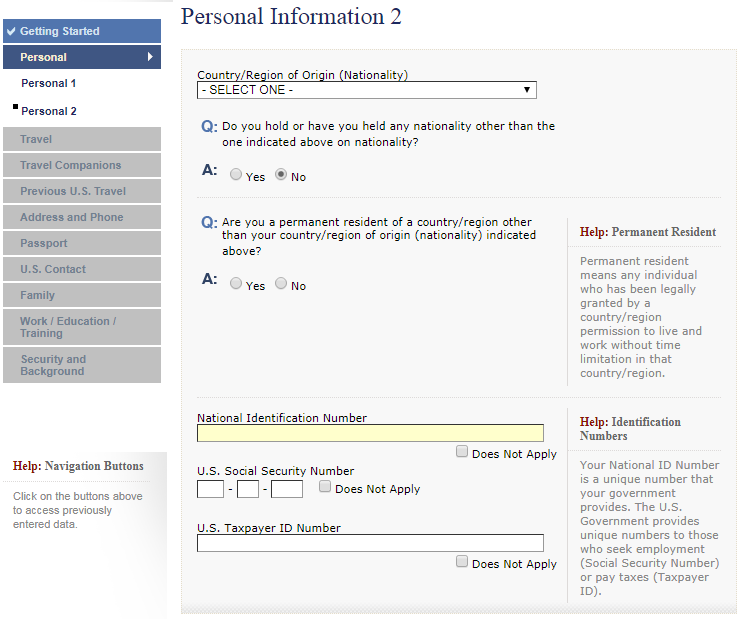
- Nationality: If you hold multiple nationalities, enter details.
- National ID number (if applicable).
If you forget some information, you can continue it later. Retrieve it later by typing the Application ID, the first 5 letters of your Surname, year of birth, and the answer to the security question.
In the first part of your DS-160 Form, you will be asked the following:
- Surname – Last name
- Given Name – given name, should you have a middle initial, you can put it after your first name (e.g., if your full name is JUAN GARCIA DELA CRUZ, put JUAN GARCIA here)
- Full Name in Native Alphabet – If you have a different alphabet, for example, Japanese, then you can type in your name using Kanji or check “Does not apply or Technology not available.”
- Other Name
- Gender: Male or Female
- Choose your Marital Status:
- Married
- Common-Law Marriage
- Civil Union / Domestic Partnership – Note: Common Law Marriage or Domestic Partnership are unmarried lovers who live together like they are married; however, definitions might differ in states or countries. Same-sex marriage is considered a Civil union in the US.
- Single
- Widowed
- Divorced
- Legally Separated
- Other
- Birthdate – Date – Month – Year Format, if you are not sure, follow what is in your passport
- Birth Place
- City – you may put your hometown or municipality where you were born
- State/Province – You may check if it doesn’t apply
- Country/Region – Country you were born in
- Double-check this; you are not typing your home address or current address but your place of birth.
Click Next, if you want to stop, you can click save your DS-160 Form.
PS: If you choose “Save,” it will automatically exit to the main portal.
- If you have another nationality besides the first one, click yes and choose the country, and answer the question if you have another passport or not. Type the passport number, too.
- If you are a permanent resident of another country, check yes, and select the country or region. If there’s none, click No.
- Type your National Identification Number, your US Social Security Number, and your US Taxpayer ID Number; if it does not apply to you, check the boxes.
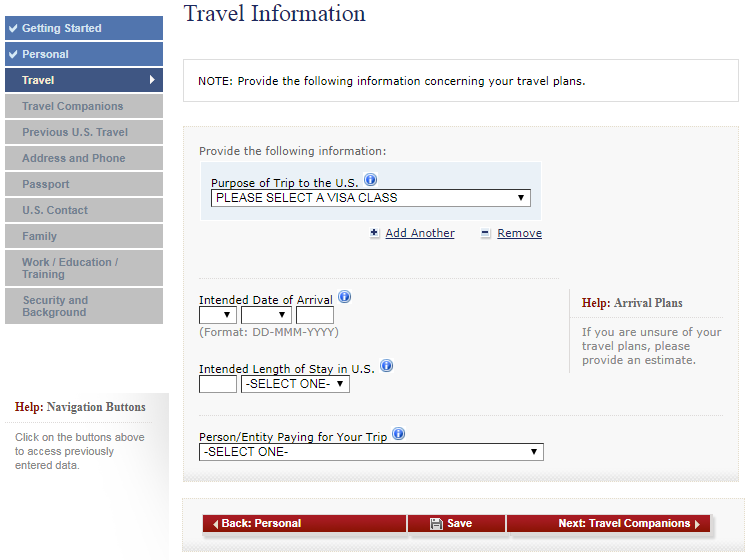
4. Travel Information
- Purpose of your trip: Tourism – choose “Temp. Business Pleasure Visitor (B)” or “Business or Tourism – B1/B2” or “Tourism or Medical Tournament – B2”
- Enter your Intended Date of Arrival (Date – Month – Year Format) and Intended Length of Stay. If you are not yet sure when you are going or how many days in your travel plans. Please estimate.
- US address (relative’s home or hotel booking)
- Person or Entity Paying – Self, Other Person, Present Employer, Employer in the US, or other Company or Organization
- Sponsor details (if someone else is funding your trip)
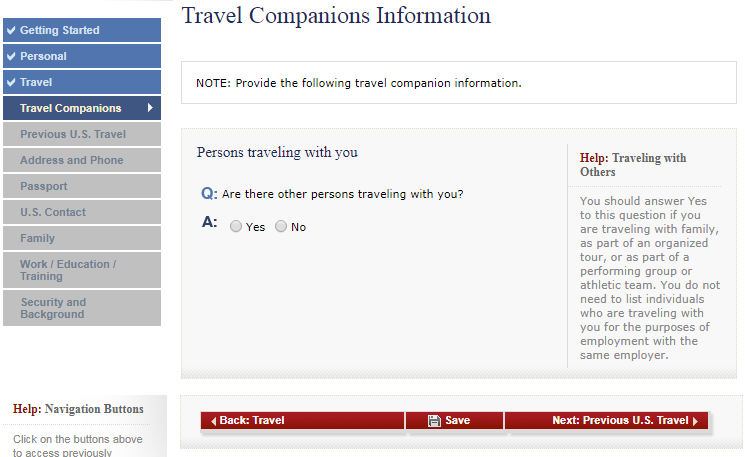
Travel Companions
- Answer if you have other persons traveling with you (family, friends, tour group, etc.)
- For those in a tour group, enter the name of the group or organization, if not, then type the names of those you are traveling with and your relationship with them (you can add more than one)
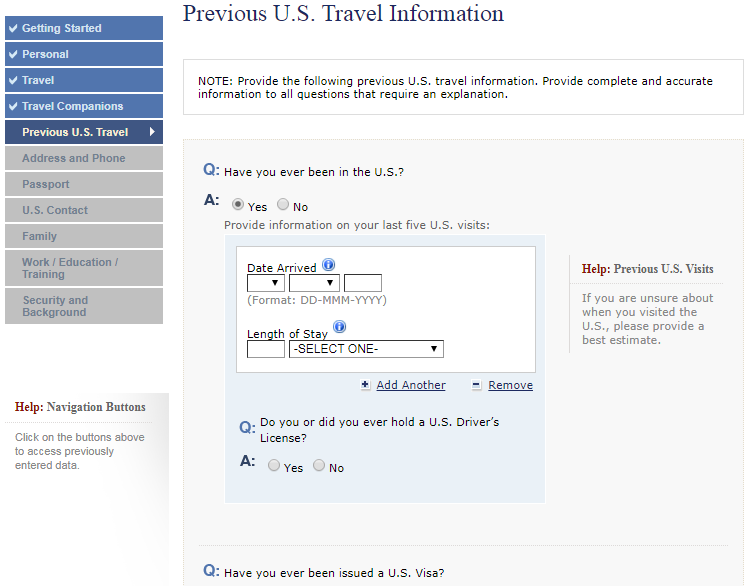
5. Previous US Travel History
- If it’s your first time in the US, choose “No”. If you have, then answer the questions like Previous dates and lengths of stay of your visit
- Enter your US Driver’s license in case you have one
- If you were issued a US Visa before, answer the next questions
- Type the date your last US Visa that was issued to you and the Visa Number (8-digit number in the lower right of your visa or 12-digit number of your Border Crossing Card)
- Answer if it’s the same type of visa or a new type (like B1/B2)
- The next question will be about the country or location where you applied for a visa (if it’s the same or not)
- Have you got all of your ten-fingerprints were taken from you? If it were only two fingerprints, answer no
- US Visa has been lost /stolen or canceled/revoked
- US Visa refusal, refused admission, or withdrawn application at the port
- Petition for US Citizenship and Immigration on your behalf
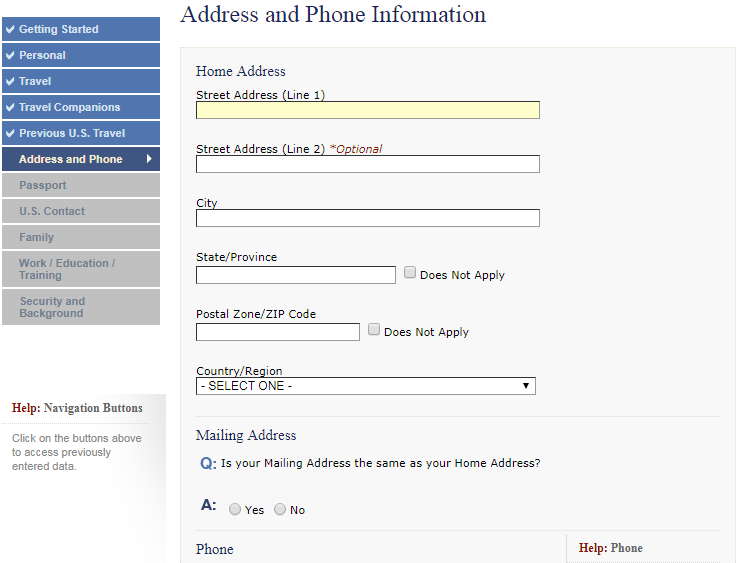
6. Address and Phone Information
- Home address
- Mailing address (if different from home)
- Primary Phone Number (also secondary and work contact number)
- E-Mail Address
- Social Media Presence – e.g., Facebook, Instagram, Twitter, etc.
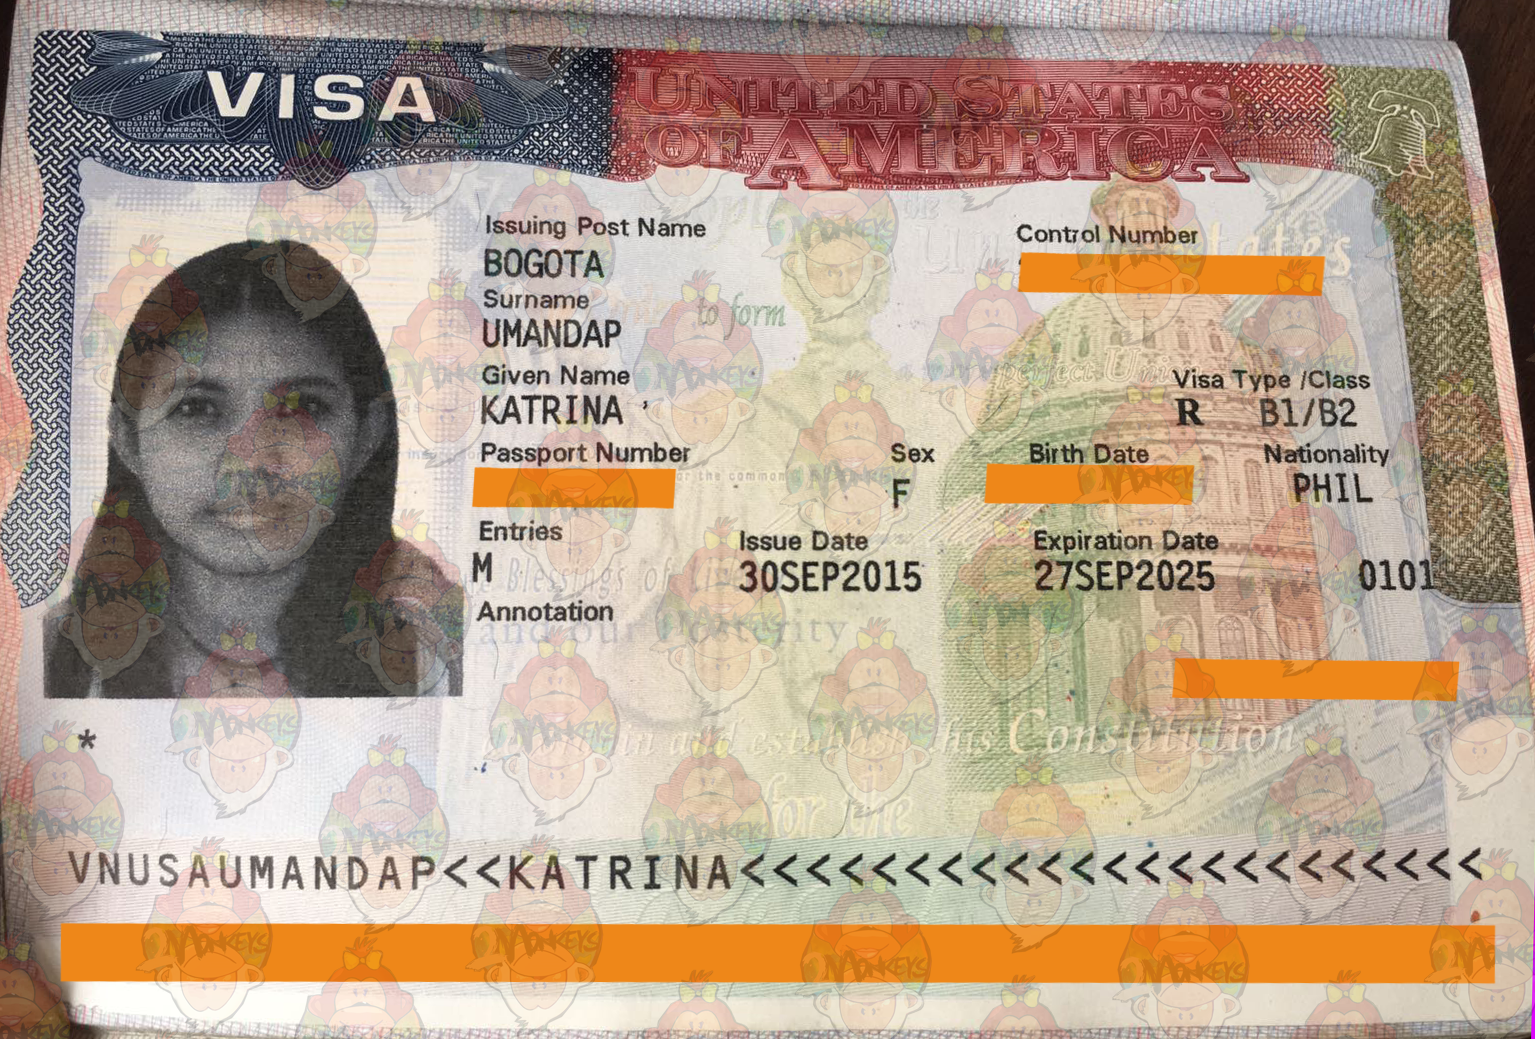
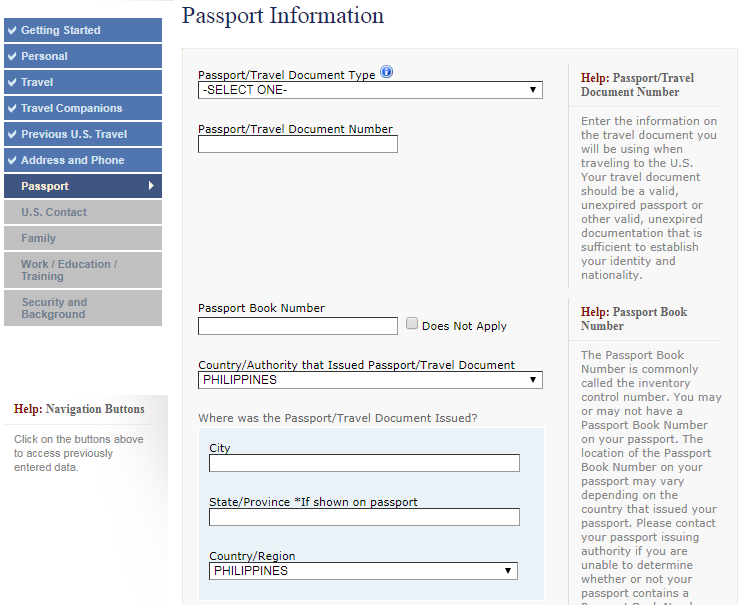
7. Passport Information
- Type of your Passport – Be it regular, official, etc.
- Passport number (Valid)
- Passport book number – it is a control number of your passport, and some countries may have it, while some may not. If it does not apply, check the box.
- Place of Issuance
- Issuance and Expiration Date (it must be at least 6 months valid beyond your arrival in the USA, if not, you may need to renew your passport)
- If you have lost or had your passport stolen (to know in case someone pretends to be you with your lost passport)
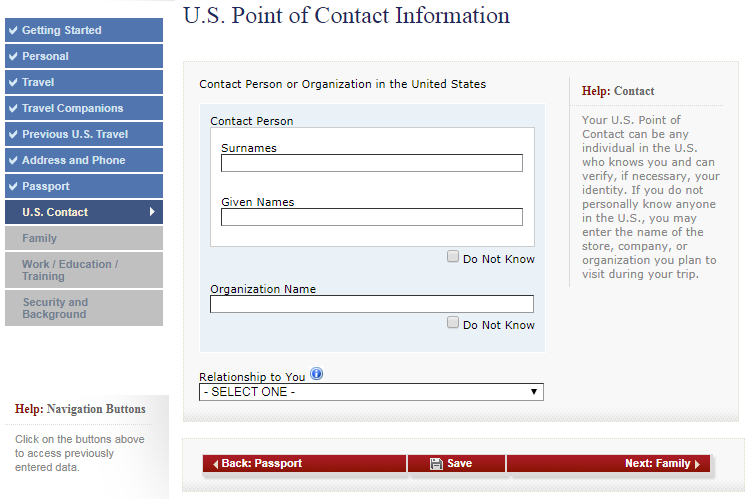
8. US Point of Contact Information
- Contact person or organization in the US that can verify your identity (you can check “Do Not Know”)
- Relationship to you
- Address and Contact Info in the US
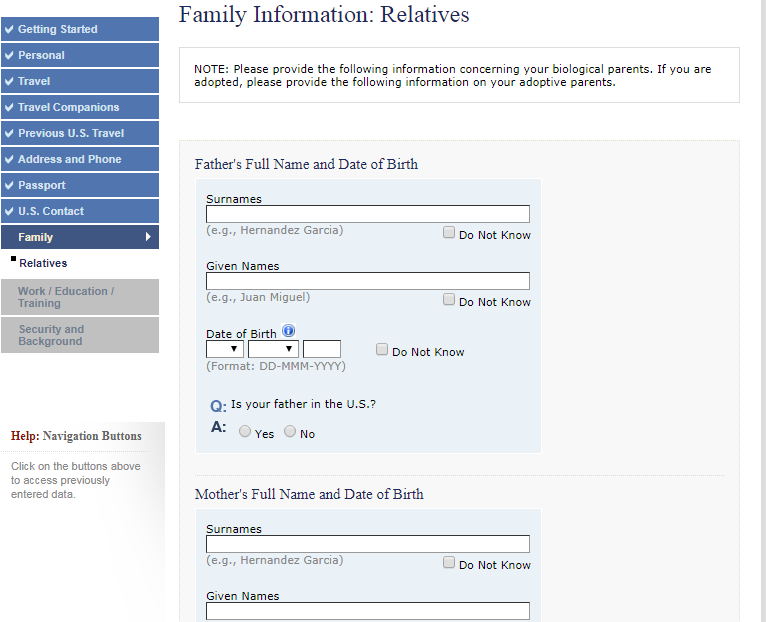
9. Family Information: Relatives
- Full Name and Date of Birth of both your Father and Mother. If you don’t know your mom or dad, it’s okay; there is an option to check “Do Not Know.”
- Is your Father and/or Mother is in the US? If you answer, yes, you will be asked what their status is in the US? Citizen, Permanent Resident, Non-immigrant, or you don’t know.
- Immediate relative (spouse, fiancé, child, or sibling in the US.) – enter their names, your relationship with them, and their status
- Other relatives in the US
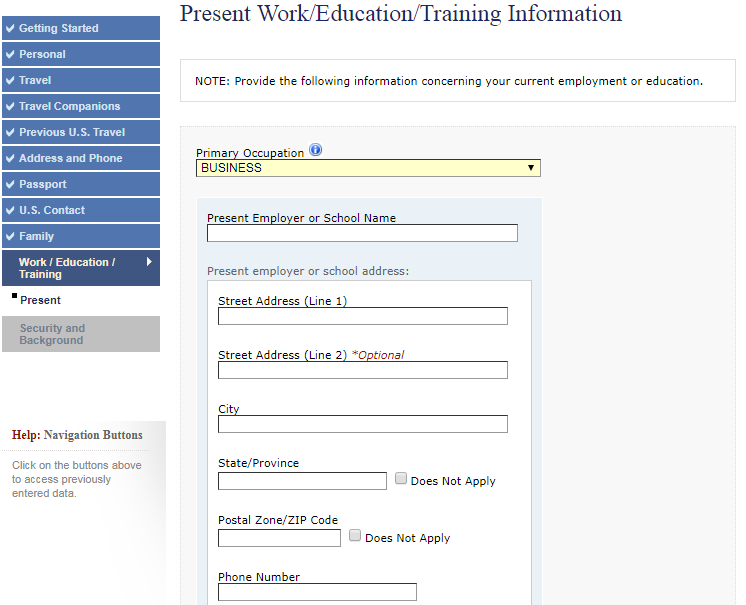
10. Present Work / Education / Training Information
- Primary occupation
- Company or School Name
- Address, your start date and monthly income in Local Currency
- If you are unemployed or a student, you may click “Does Not Apply” on Monthly income
- Work Description
- Special skills & military service (if applicable)
11. Security and Background Questions
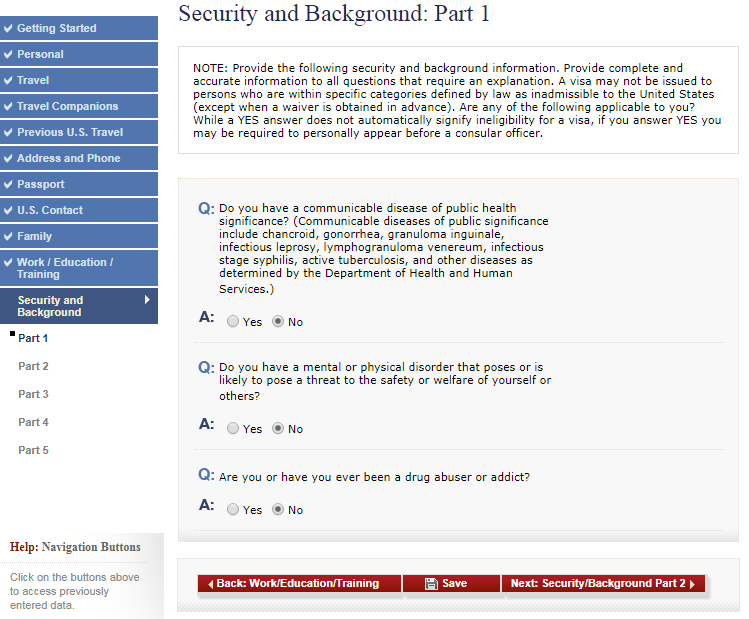
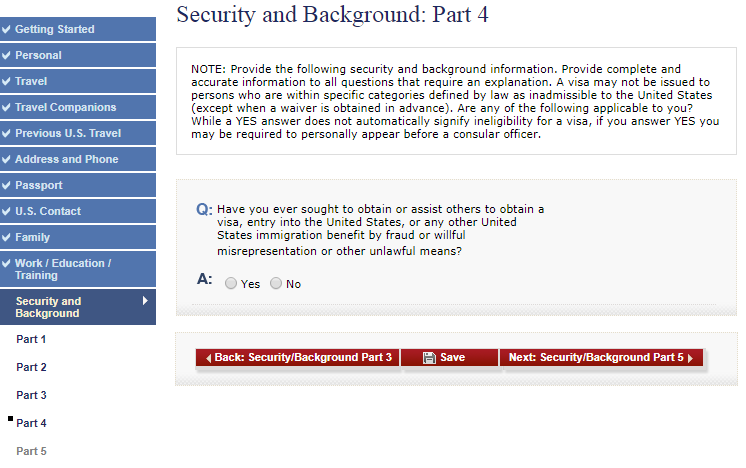
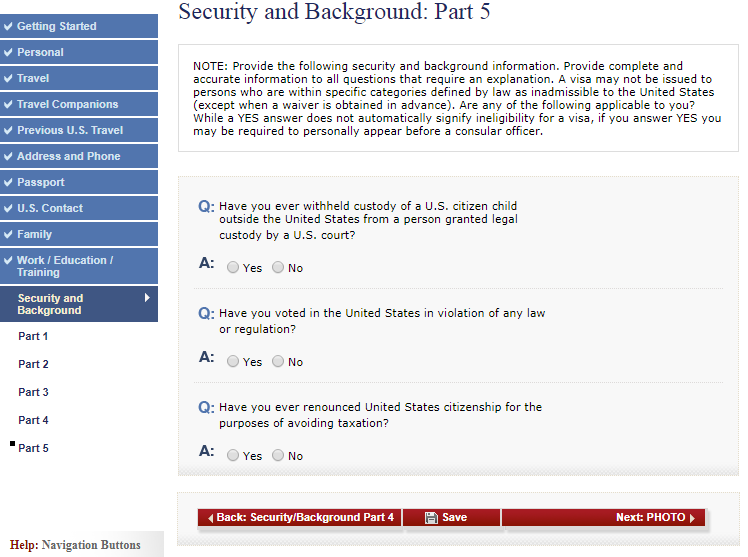
Answer Yes or No. If you answer “Yes,” you must put in an explanation. Though it doesn’t mean if you answered “Yes,” you will be denied a visa, but you need to explain properly or have an interview at the consular office.
12. Upload Your Photo
Use the online photo tool to meet U.S. visa photo guidelines. The cropping tool will help you in the dimensions.
- Recent (within 6 months), color photo with white background
- Full face with a neutral expression
- Normal clothing and no headwear (except if you are a religious person or need to wear it every day)
- No eyeglasses
Bring a 5cm x 5cm photo (the same as the one you uploaded) on your interview.
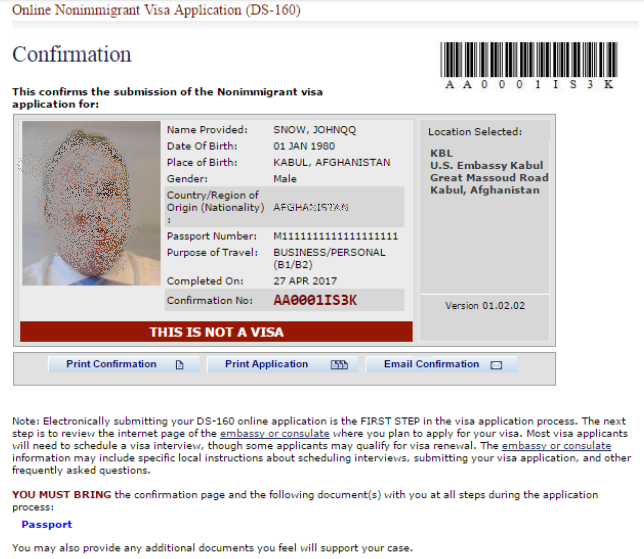
13. Review, Sign, & Submit Your Application
Double-check for errors and make sure all information is correct before submitting. Then electronically sign your DS-160 form.
Print or e-mail the confirmation page and bring it during the interview. You can use the barcode to make an appointment.
Be honest on your DS-160 form and during the interview. Dress professionally for your appointment. Practice answering common interview questions. Stay calm & confident.
Carry essentials like a water bottle, solar power bank, and earplugs to stay comfortable while waiting.
I hope you can successfully apply for a USA Visa. Should you need help with your application, we offer a Visa Application Bundle that can let you have a one-on-one call to go through your documents and prepare you for the interview. Best of luck!
FAQ
You are required to sign and submit your application electronically, unless you’re eligible for an exemption. Even if someone helped you fill out the form, only you, as the applicant, can click the “Sign Application” button.
You don’t need to provide passwords, but you should list all the “handles” or user IDs you’ve used on sites like Twitter and Facebook. This is a recent addition to the DS-160, with USCIS officials now required to check your social media activity while reviewing your application.
Current, valid passport. Intended travel itinerary for your U.S. trip. Proof of funds to cover the entire cost of travel (bank statements, proof of assets, etc). Proof of strong ties to your home country (employment verification, school enrollment, property ownership, etc).