Generating your own electricity from renewable sources like photovoltaic panels is nothing new; consumer solar panel systems and solar power generators have been around for quite some time now and have come a long way in the past two decades. What used to be a huge financial investment with a long payback of up to ten years and “professional installers” has developed into a booming industry full of affordable systems that you can install yourself and start feeling the benefit of right away.
Modular Solar Panels and Charging System for Boats, RV’s and the Home
Having bought a live aboard sailboat that we plan to travel the world on, one of our biggest considerations was how to live independently and as off-grid as possible, whilst still being able to enjoy some of the simple comforts and conveniences of modern living. On a boat, the minimum we need to generate power for are; LED lighting, navigation chart plotter, bilge pumps, refrigeration, mast-top lights, laptop and camera charging, engine battery charging. These are just the basics that we need to start with, so that as we get to know the boat and how we want to live on it, we have the capacity to expand our solar generation and storage capacity if necessary. If we start adding more complex systems, such as radar, AIS (Automatic Identification System), satellite weather updates, water maker and all kinds of other possibilities, then our power needs could start to grow significantly!
 Modular Solar Panels and Charging System for Boats, RV’s and the Home
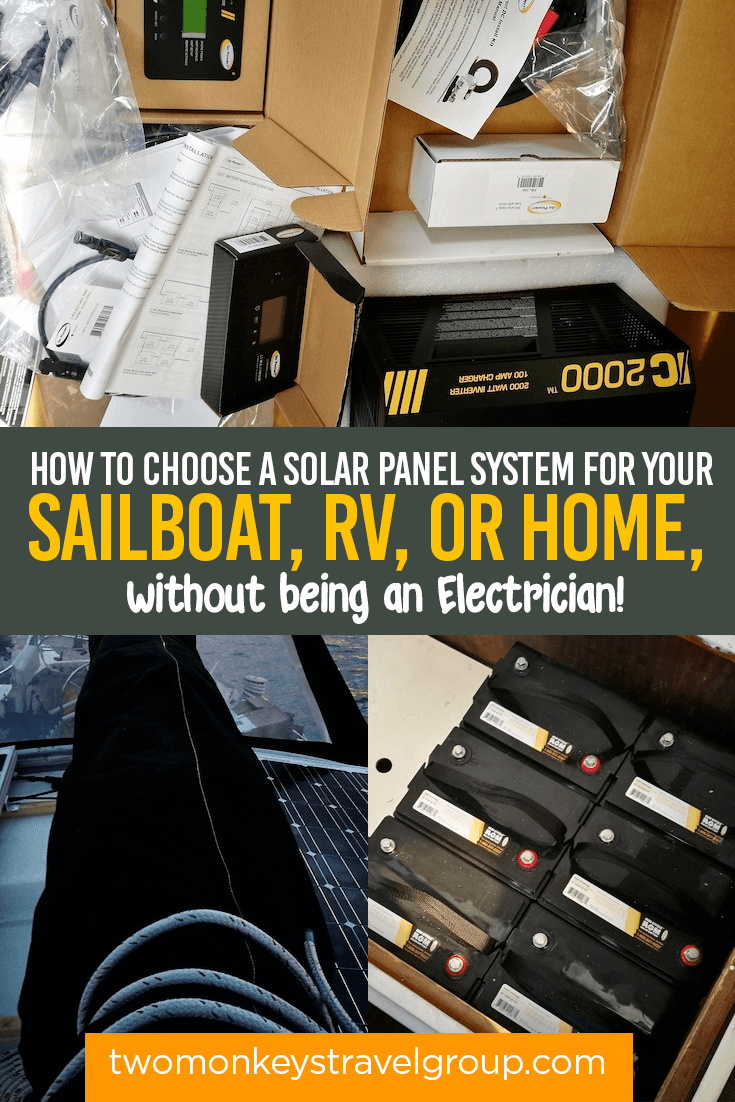
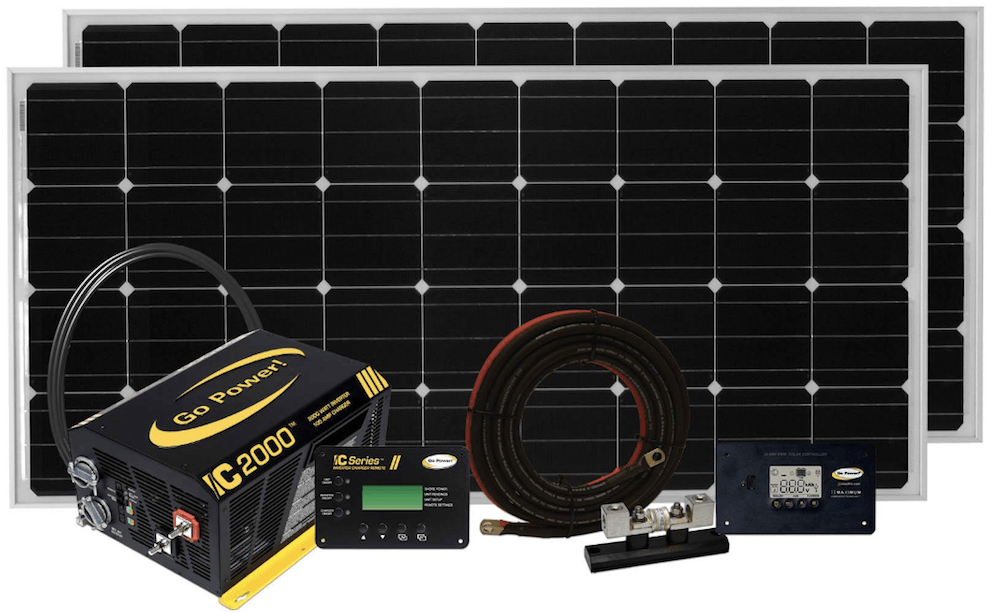
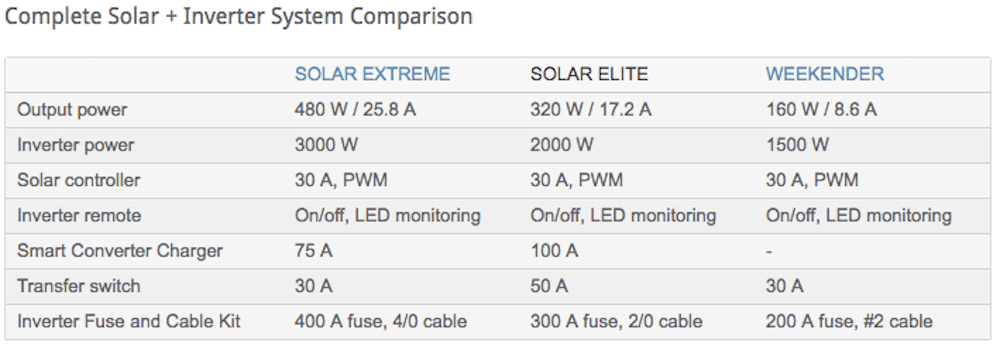
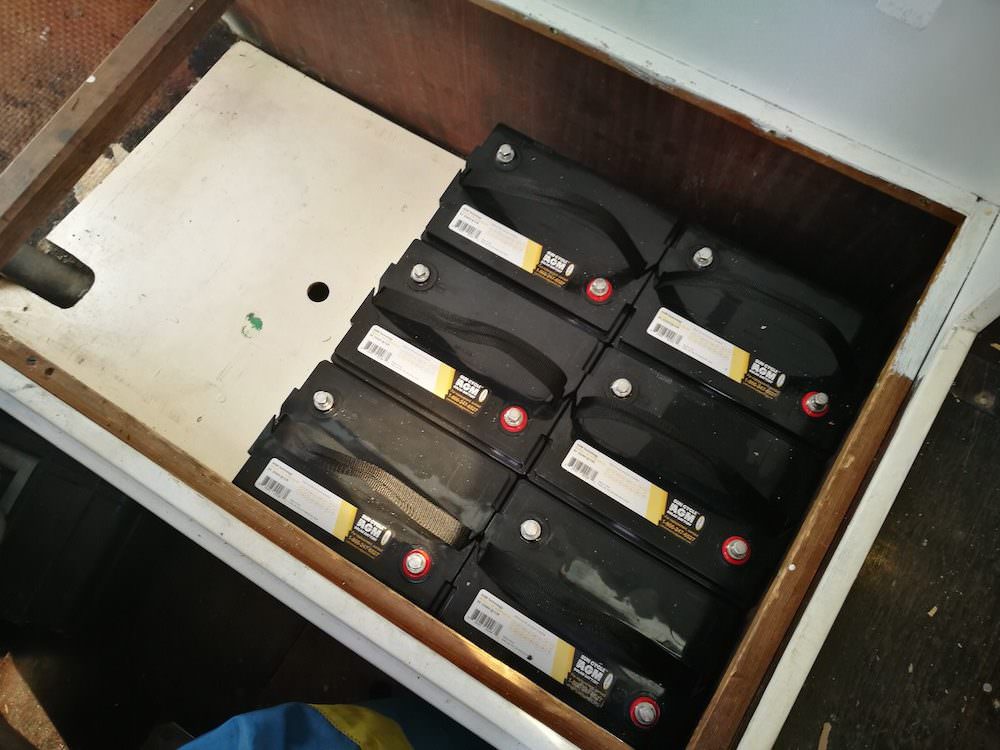
Because we knew that we needed the ability to easily expand or reduce our system in the future, we decided that the best option for us was to take a modular approach, with a system of components that are designed to work together was efficiently as possible, able to be installed with only basic knowledge and tools, with the ability to expand (or even reduce) the system as our needs change. For this reason, we decided to find a single supplier of a complete, customisable modular solar system, rather than sourcing the various parts ourselves from wherever we could find them. The system we chose was the 320 Watt Solar Elite Charging System from Go Power Electric, which comes a complete kit including; 2 x 160 watt solar panels, 2000 watt pure sine wave Inverter Charger for AC power, Inverter charger remote, 30 amp pulse width modulated solar charge controller with digital screen, DC inverter install kit, 50′ of MC4 output cable (#10) and all the necessary mounting hardware. We added the Overland Expansion Kit, which is one more 160 Watt solar panel with all the necessary connectors. We then chose to install a battery bank of 6 x 6 volt AGM batteries, wired into a 12 volt system. Every listed above was supplied by Go Power Electric, so we had the added benefit that they have designed all components of this system to be as compatible and efficient as possible. Of course, we have left out the most important first step in the whole process, so to demonstrate just how simple and stress free it was for us to select the solar panel charging system that would suit our needs, here’s a step-by-step guide:
Step 1: Complete an Energy Audit
The key to a successful solar power installation, in any situation or environment, is to complete a thorough audit of your energy requirements. This will tell you exactly what devices, appliances, gadgets etc you will need to generate electricity for and how much storage capacity (batteries) you will need. To do this, make a complete list of every electrical device and piece of equipment you plan to use with your boat, RV, or home solar power system.

Once you have made that list, separate them into two categories: 12 Volt DC and 120 Volt AC (240 Volt AC in the UK). Any AC (mains electricity supply in your home) powered device will need an inverter to convert the 12 Volt DC power in your batteries, to 120V AC.
The next stage of your energy audit is to make a note next to each device of the amps they use. In simplistic terms, the amps is the quantity of electrical power that a device consumes per hour of use.
Finally, add together all of the amps to come up with two totals – total amps for 120V AC and total amps for 12V DC. These two amp totals combined will dictate your battery storage requirements, while the total amps for 120V AC will dictate what size of inverter you need to power them.
Although you will probably never be using all of these devices at the same time, these totals are a good guideline to work with, as batteries should never be run down below 50% capacity because they simply won’t charge or hold charge as efficiently ever again. This means that whatever the total amps of storage you think you have in your batteries you need to cut it in half to get the amount that you can actually use!
For our own solar energy audit, we used the solar power calculator tool on the Go Power Electric website, then spoke directly with their technical team to double check our numbers and discuss the system that would be best for our needs.
Step 2: Choose your Solar Panels and Charging System
The whole point of an energy audit is to find out how much energy you need to create, how many batteries you need to be able to store it and what size inverter you need to power your 120V AC (or 240V AC) appliances. Solar panels vary in terms of quality and efficiency and usually translates into a price difference, but the general rule is that a larger panel with more photovoltaic cells will generate more electricity than a smaller panel of similar quality and cell size. So the bigger the panel, the greater the number of photovoltaic cells, the more energy you will be able to produce.
 Modular Solar Panels and Charging System for Boats, RV’s and the Home
Solar panels are usually listed rated by their wattage, but their efficiency varies, so you need to check the specified charging capacity, in amps, of each panel.
The Solar Elite system we chose from Go Power, with the added Overlander Expansion kit, gave us 3 x 160 Watt Solar Panels with a charging capacity of up to 26.4 amps, in optimum conditions. The 2000 Watt pure sine wave inverter charger gives us an excess of capacity for 120V AC use, but leaves us with the ability to expand the system if our usage increases.
Step 3: Assess Your Physical Storage Capacity and Solar Panel Locations
Step 2 and step 3 are a bit of a chicken and egg situation the first time you start looking at solar panel systems. You need to know how much space you have available for solar panels, batteries, inverter and any other equipments or accessories to do the job. However, if this is your first ever solar installation, you probably won’t know what type of spaces you need, or what size panels come in, or what an inverter looks like, so there will be some bouncing back and forth between Step 2 and Step 3 while you figure all that out! Make sure you check all of the critical dimensions of the solar panels and any equipment, as well as the environment they will be installed in. On the simplest level, solar panels need to be in direct sunlight, with zero or minimal shading.
 Modular Solar Panels and Charging System for Boats, RV’s and the Home
Your solar charge controller, inverter/charger, batteries and any other accessories, need to be stored in a secure, dry space, with the shortest possible cable runs between the controller, the batteries and any appliances they are going to be powering. Give consideration to maintenance though, so make sure everything is easily accessible and leave at least a couple of feet of extra cable coiled at each end, so you can move things to work on them with damaging connections.
Step 4: Install your Solar Panel, Batteries and Charging System
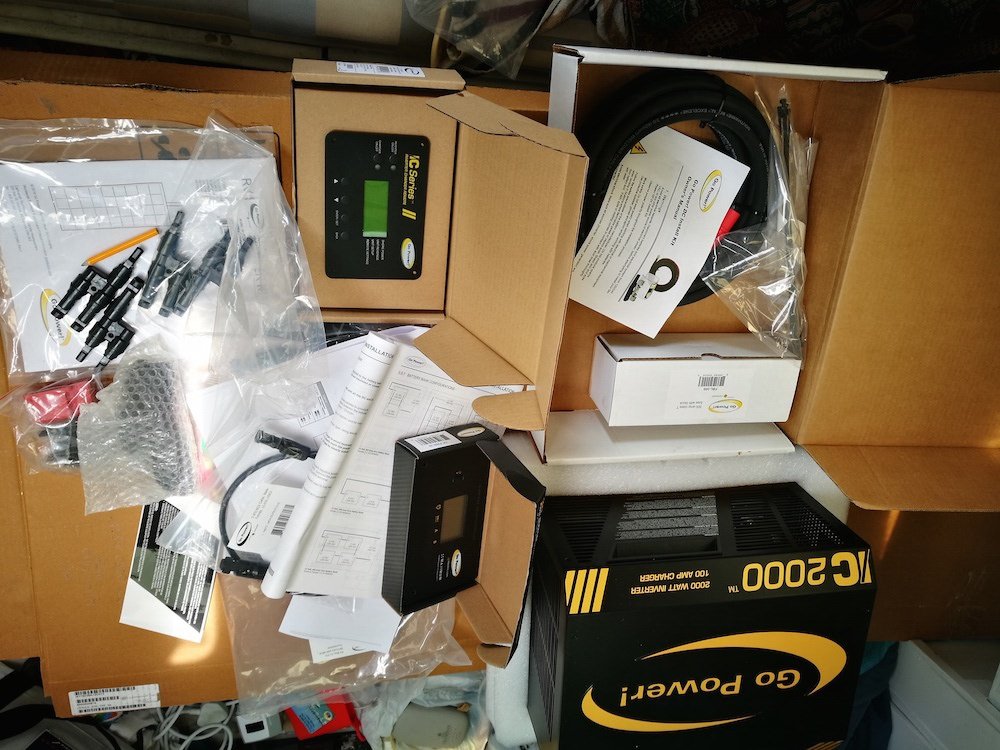
This should really be the shortest and simplest step of all if you have planned everything well and especially if you have chosen a modular system in kit form, which comes complete with detailed instructions on how to put it all together safely. You do not need to be a qualified electrician to be able to do this (depending on the laws of your country or state), but you do need some basic knowledge of how electrical systems work, plus some basic electrical tools. If you have absolutely none of either of these, then it would be sensible to get some professional help with the installation.
 Modular Solar Panels and Charging System for Boats, RV’s and the Home
I have a reasonable knowledge of how 12 Volt and 120 Volt systems work, how to wire properly, plus a little knowledge about solar. I decided that I felt confident (and competent) enough to put the system together myself, using the detailed instructions that came with every part of the Go Power modular solar kit.
Step 5: Plug in and Enjoy the Benefits of Clean, Renewable Solar Energy on your Boat, RV, or in Your Home!
It’s as simple as that! As long as you don’t rush in, complete a thorough energy audit and take the time to learn about how photovoltaic solar panel systems work, you will be well-equipped to make the right choices for your energy needs and budget.
Once I actually came to the installation itself, I already knew exactly what I needed to do, so putting everything together only took a single day!
 Modular Solar Panels and Charging System for Boats, RV’s and the Home
Because our installation is a little different, I have had to split it up into two stages:
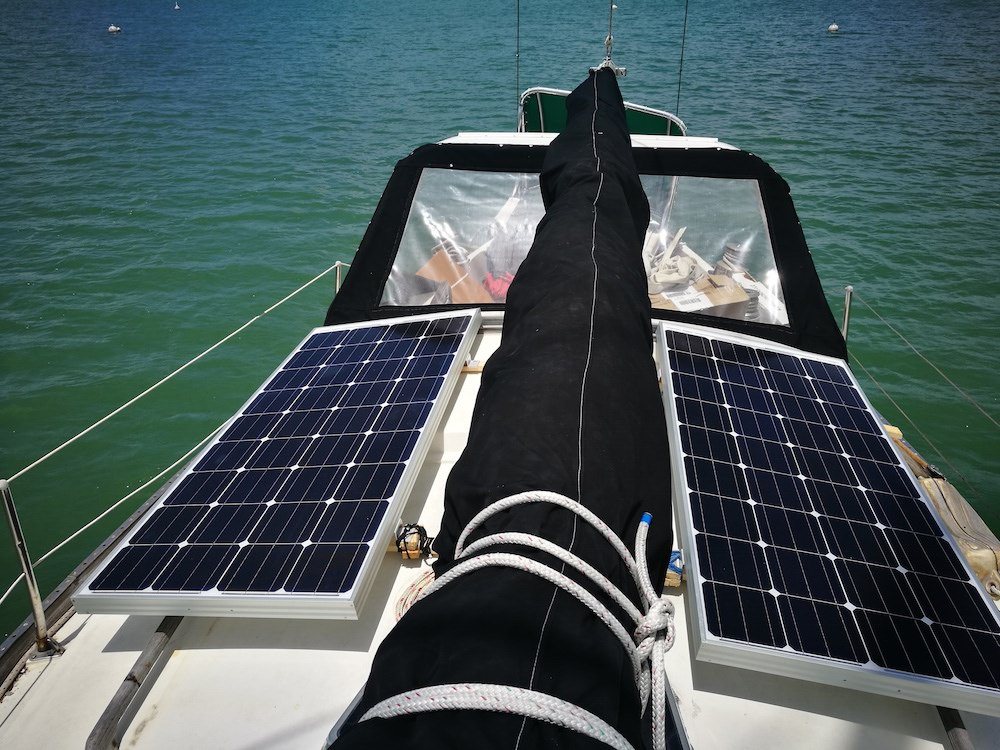
Stage 1: 2 x 160 Watt Deck mounted panels with 2 x 6 volt batteries (12Volt)
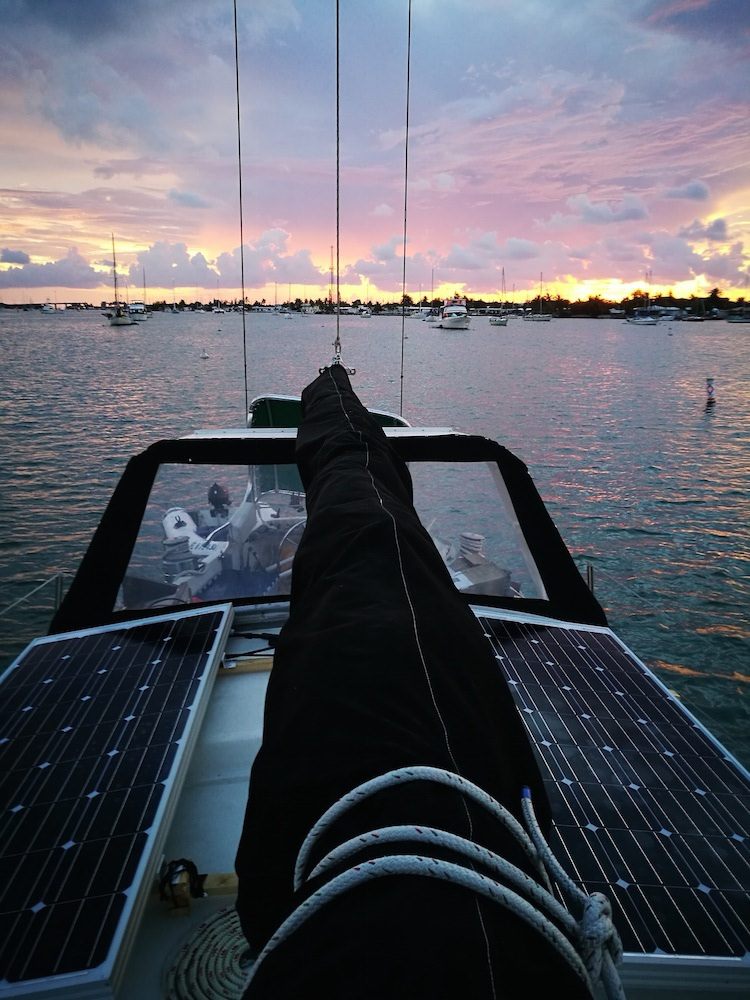
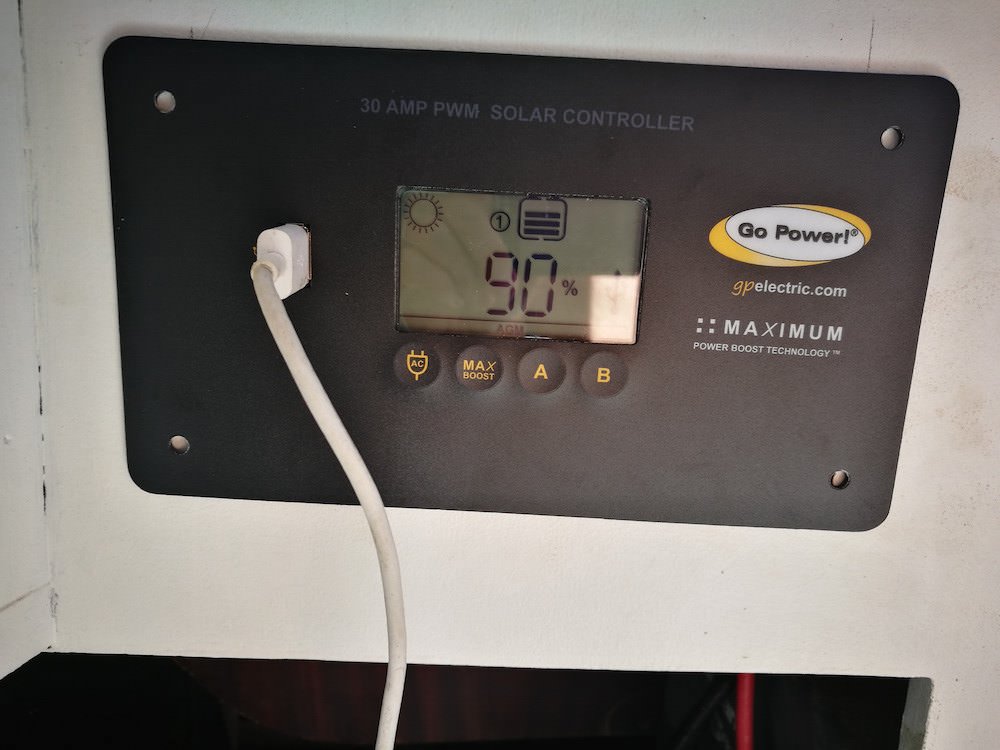
Our solar panels and charging system were delivered before I was able to build an aluminium frame over the cockpit of our sailboat and before I had built a secure battery box to house all 6 of the AGM batteries. For this reason, I decided to mount 2 panels onto the deck of the boat just to get started, then wire them to the solar controller inside the boat and finally connect that to two of the batteries. This gave me a simple 12 Volt system with enough charging and storage capacity to power my lights, the bilge pumps and the fresh water pump so I could at least wash my hands!
 Modular Solar Panels and Charging System for Boats, RV’s and the Home
Stage 2: Mount 3 Panels Over Cockpit, Install Full Battery Bank, Install Inverter Charger.
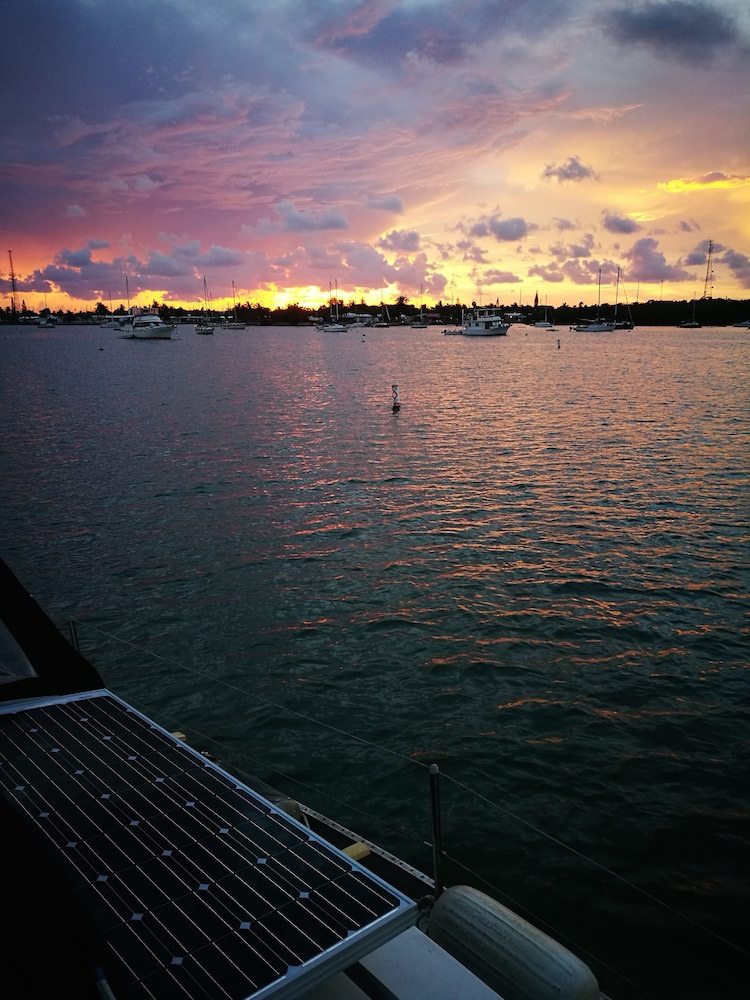
While working on the sailboat on a mooring, it’s perfectly fine to have two of the solar panels mounted on the deck of the boat, but it’s terrible place to have them while sailing for all kind of reasons – tripping, injuries, access to the boom and sails, damage from falling on them and being ripped off the deck by big waves, for instance. Our plan is to build an aluminium framework over the top of the cockpit, onto which the solar panels will be mounted and will also double as a rigid cover from sun and rain. In this position the panels will be much safer, see less shading and won’t present a safety hazard on deck.
 Modular Solar Panels and Charging System for Boats, RV’s and the Home
I have a space planned under one of the sofas, along the centre line of the boat, in which to build a battery box for all six batteries. Once these are installed I will be able to install the 2000 watt inverter charger for using 120V AC devices and appliances.
Find the best prices for the Go Power Electric Solar Elite system on Amazon!
Check out this video of the first stage of the solar panel installation on our sailboat, S/V Empress!
![]() Are you on Pinterest? Pin these!
Are you on Pinterest? Pin these!